Using Analyses Captured in RECAST
This section discusses how to run RECASTable analyses.
Preparing Inputs
In order to use an analysis, you will need to prepare a set of inputs for the new signal.
- Prepare Job Options for the new signal
- Request appropriate derivations (the format used in the original analysis)
- Prepare input YAML files for use with
recast
Running RECAST on REANA
If it isn't possible to run the full analysis chain locally due to time and/or CPU constraints, the current alternative is to run it on the CERN REANA cluster. There are a few modifications that will need to be made to the docker images, analysis repos and execution commands to run the workflow on REANA, which are detailed below.
IMPORTANT UPDATE (July 15, 2021): There has been some recent development work on the part of Lukas Heinrich to integrate workflow execution on REANA into the recast-atlas client, and these docs have recently been updated to make use of this integration. In order for the instructions to work, please make sure that you're using the latest version of the recast-atlas client (currently 0.3.0), and upgrade to the latest version if needed:
python -m pip install --upgrade recast-atlas  # Upgrade to latest recast-atlas client
python -m pip show recast-atlas  # Check that you're now working with the latest version (0.3.0 or later)
Example Run
As a first example, let's try running the helloworld example workflow with reana. This example assumes that you already have an access token for the CERN REANA cluster - if you don't, you can go to https://reana.cern.ch to request one.
# Install recast-atlas and a compatible reana client
python -m pip install --upgrade 'recast-atlas[reana]'

# Clone the helloworld repo
git clone ssh://git@gitlab.cern.ch:7999/recast-atlas/examples/helloworld.git
cd helloworld

# Set up environment variables to access the REANA instance at CERN
export REANA_SERVER_URL=https://reana.cern.ch/
export REANA_ACCESS_TOKEN=XXXXXXXXXXXXXXXX

# Add the helloworld example workflow to the catalogue
$(recast catalogue add $PWD)

# Submit to reana using the '--backend reana' option
recast submit examples/helloworld --backend reana --tag helloworld
Now you can go to https://reana.cern.ch to check that your workflow recast-helloworld has been queued. It should eventually start running and complete. Once complete, you can download the results as follows:
# download results
reana-client download -w recast-helloworld
Modifications Needed to Run on REANA
0. Make sure the commit hash is included in your gitlab repo image names
Click to view details!
REANA will only re-pull a docker image if the specified tag name has changed. For example, if the docker image for your gitlab project is being saved asgitlab-registry.cern.ch/your_namespace/your_project:master, REANA won't know to re-pull the updated image if a new commit has been made on the master branch of your_project.
For this reason, it's important to include the short commit hash in the image name using Gitlab's internal CI_COMMIT_SHORT_SHA variable (see the sample .gitlab-ci.yml file in Building a Docker Image in CI for an example of how to do this). Remember that you'll then need to update the image tag name to the proper short commit hash in the steps.yml file to run the workflow with the latest commit of your_project. Eg.
environment:
  environment_type: docker-encapsulated
  image: gitlab-registry.cern.ch/your_namespace/your_project
  imagetag: master-[old_short_SHA]
environment:
  environment_type: docker-encapsulated
  image: gitlab-registry.cern.ch/your_namespace/your_project
  imagetag: master-[new_short_SHA]
1. Add reana user as a member to your gitlab repos
Click to view details!
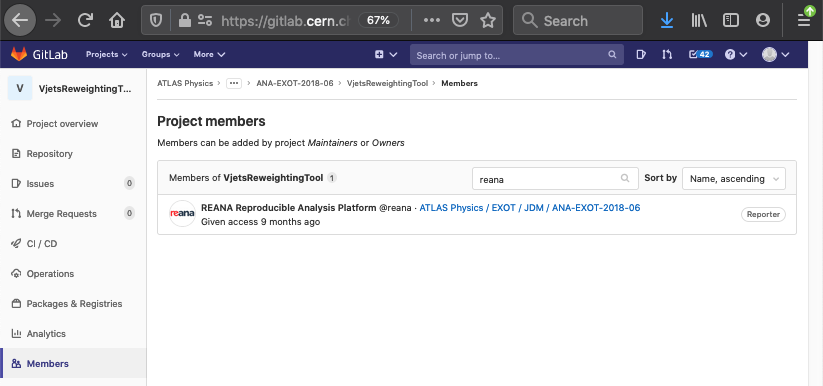
In order for REANA to pull the docker images created by gitlab CI for your gitlab projects, addreana user as a member to each gitlab repository used in the workflow, with at least Reporter status. Note: this step is only necessary for projects which are not public (i.e private or CERN Internal). See example below for the VJetsReweightingTool repo:

2. Mod to Dockerfiles
Click to view details!
REANA requires that the user in the container image (atlas in the case of atlas images such as gitlab-registry.cern.ch/atlas/athena/analysisbase:21.2.247) belong to the root group in order to access shared storage on the REANA cluster. This currently is not the case by default for atlas images. If using a different base image, you can check which group(s) the user in your image belongs to as follows:
docker run --rm -it [your analysis image name]:[image tag] /bin/bash
id -Gn
docker run --rm -it gitlab-registry.cern.ch/atlas/athena/analysisbase:21.2.247 /bin/bash
id -Gn
atlas wheel
atlas user belongs to the atlas and wheel groups (but not the root group). In this case, the following line needs to be added at the end of the Dockerfile used to create each analysis image to add the user to the root group:
RUN source ~/release_setup.sh && sudo usermod -aG root atlas
Running the workflow on REANA
The workflow can be submitted to the reana cluster using the recast-atlas client.
Note that monitoring and downloading of workflow results from the command line is currently still done directly using the reana-client interface, as this functionality hasn't yet been integrated into the recast-atlas client.
Setting up reana-client
Make sure you have the latest version of the recast-atlas client installed, along with the reana-client dependency:
python -m pip install --upgrade 'recast-atlas[reana]'
You can test whether the reana-client dependency has been properly installed by checking that:
reana-client --help
outputs usage instructions.
Set up environment variables to access reana.cern.ch cluster
Two environment variables, REANA_SERVER_URL and REANA_ACCESS_TOKEN, are needed to connect your reana-client to CERN's reana.cern.ch cluster.
Click to view details!
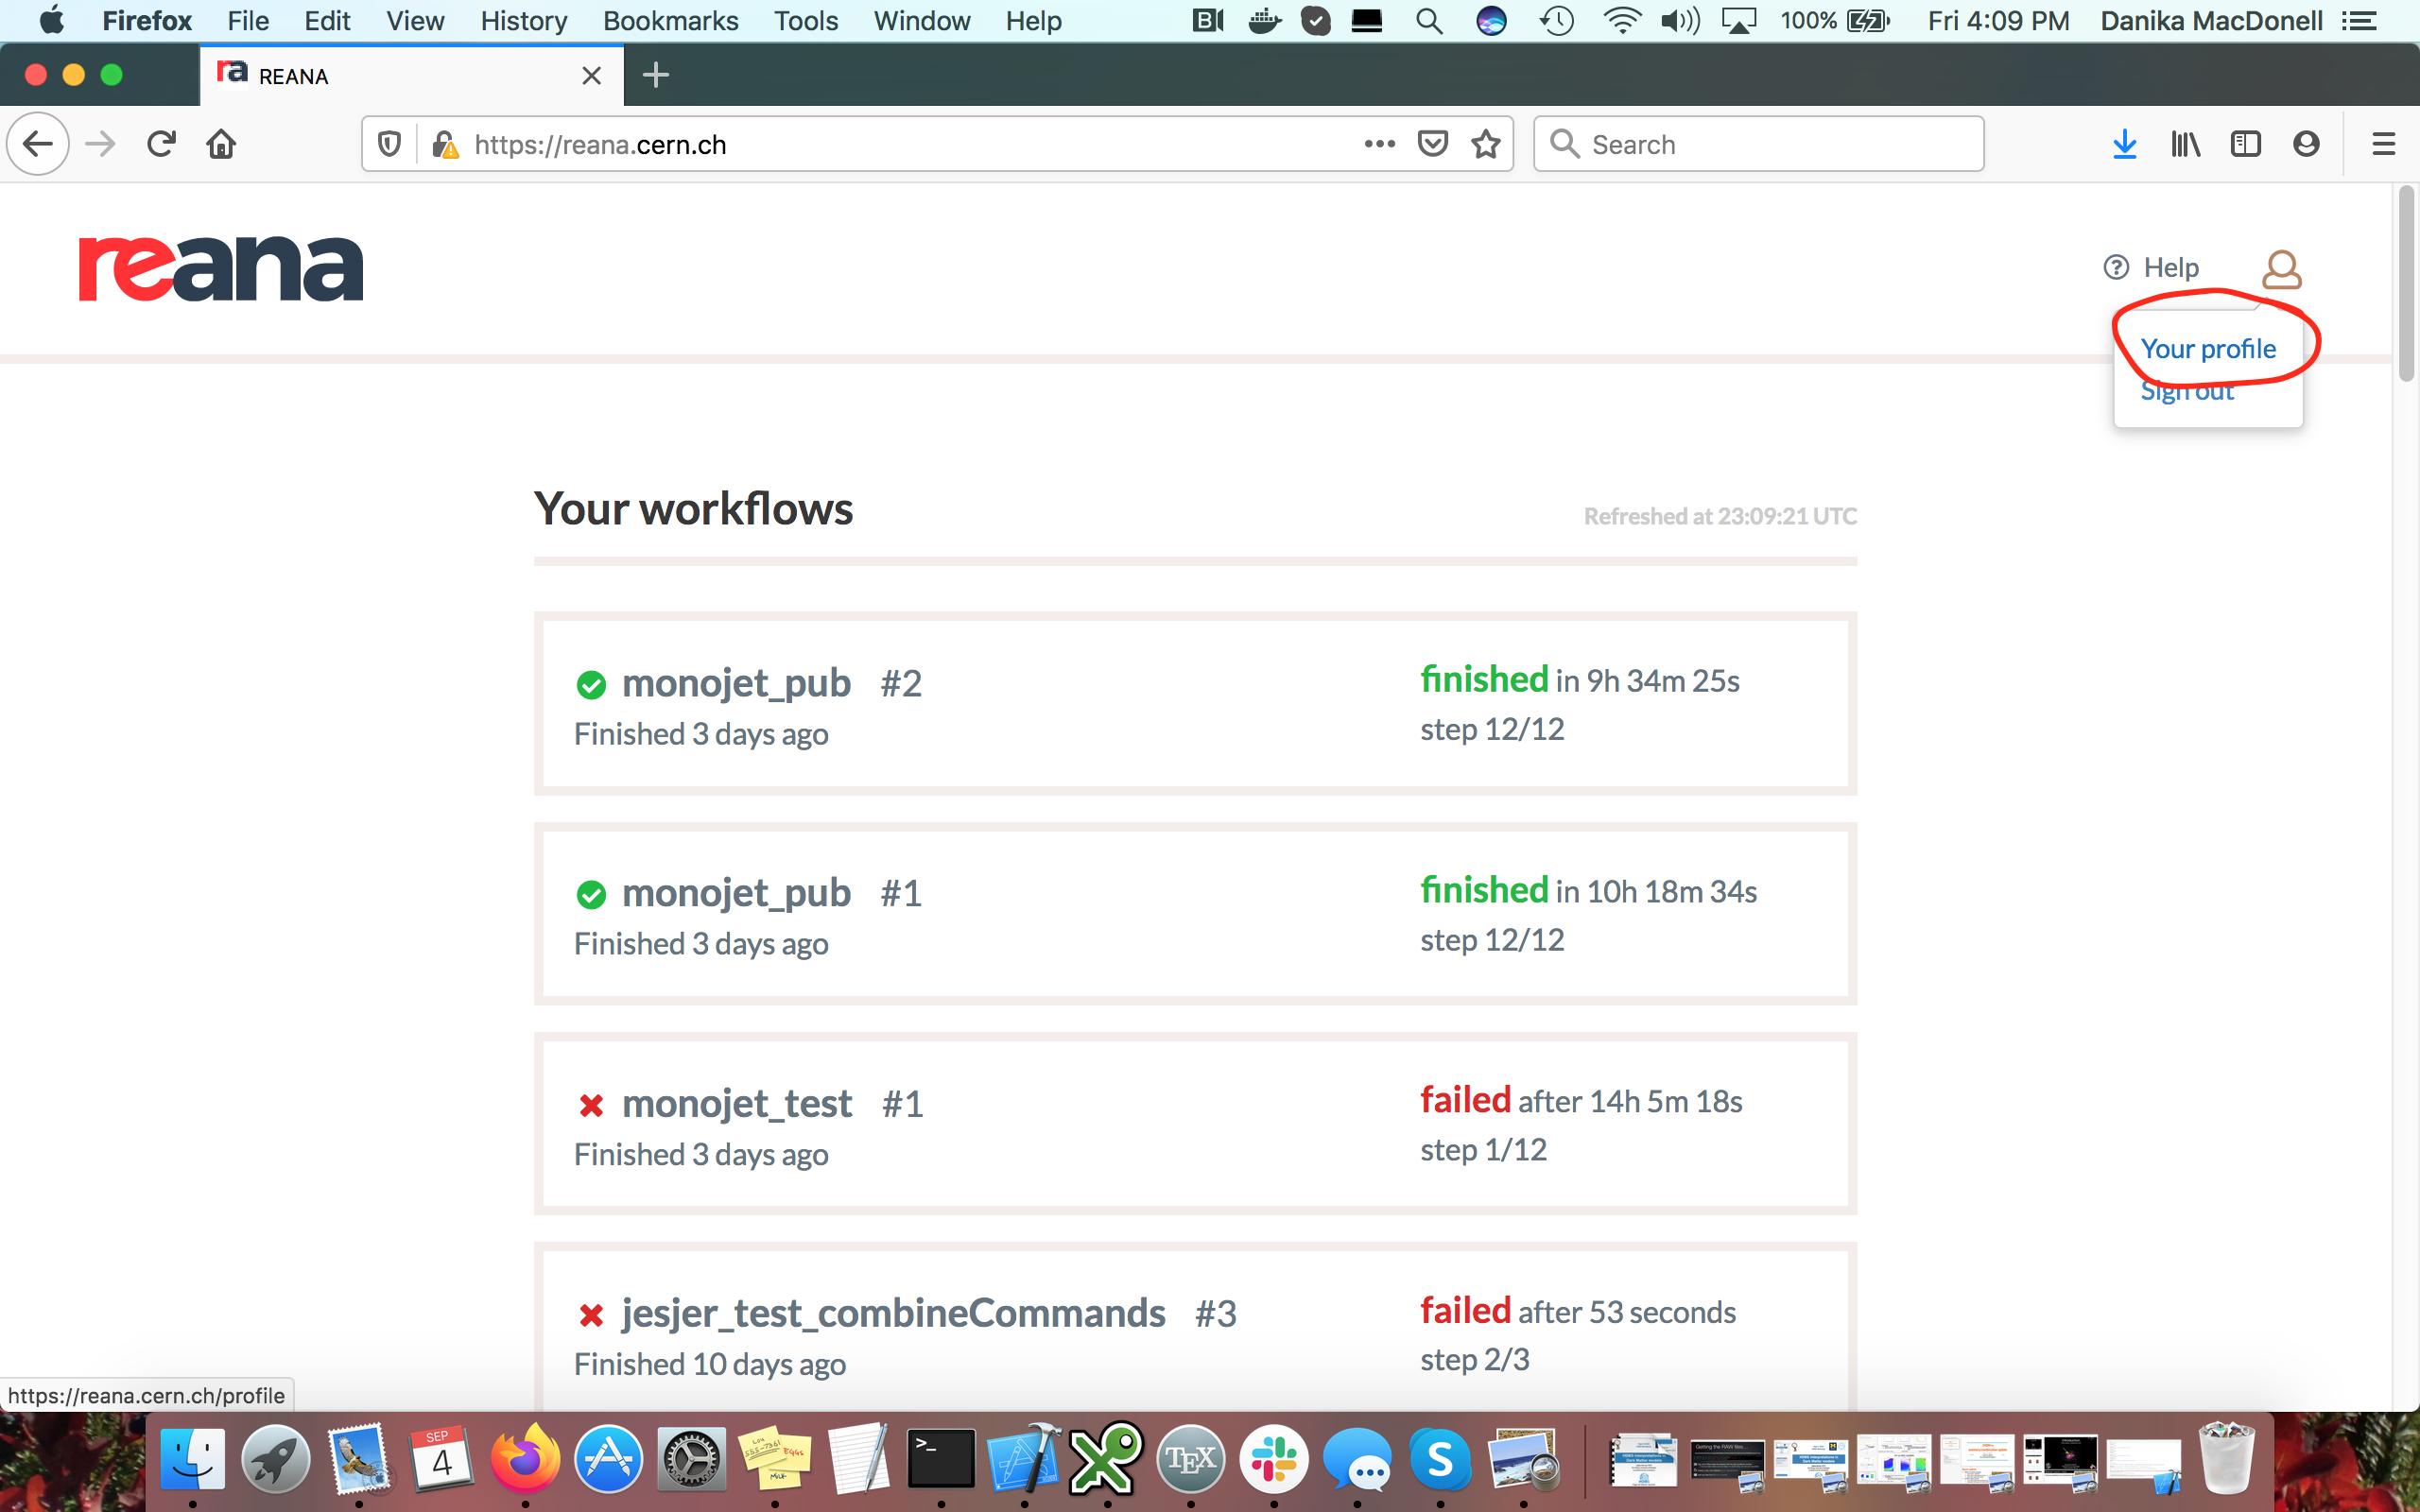
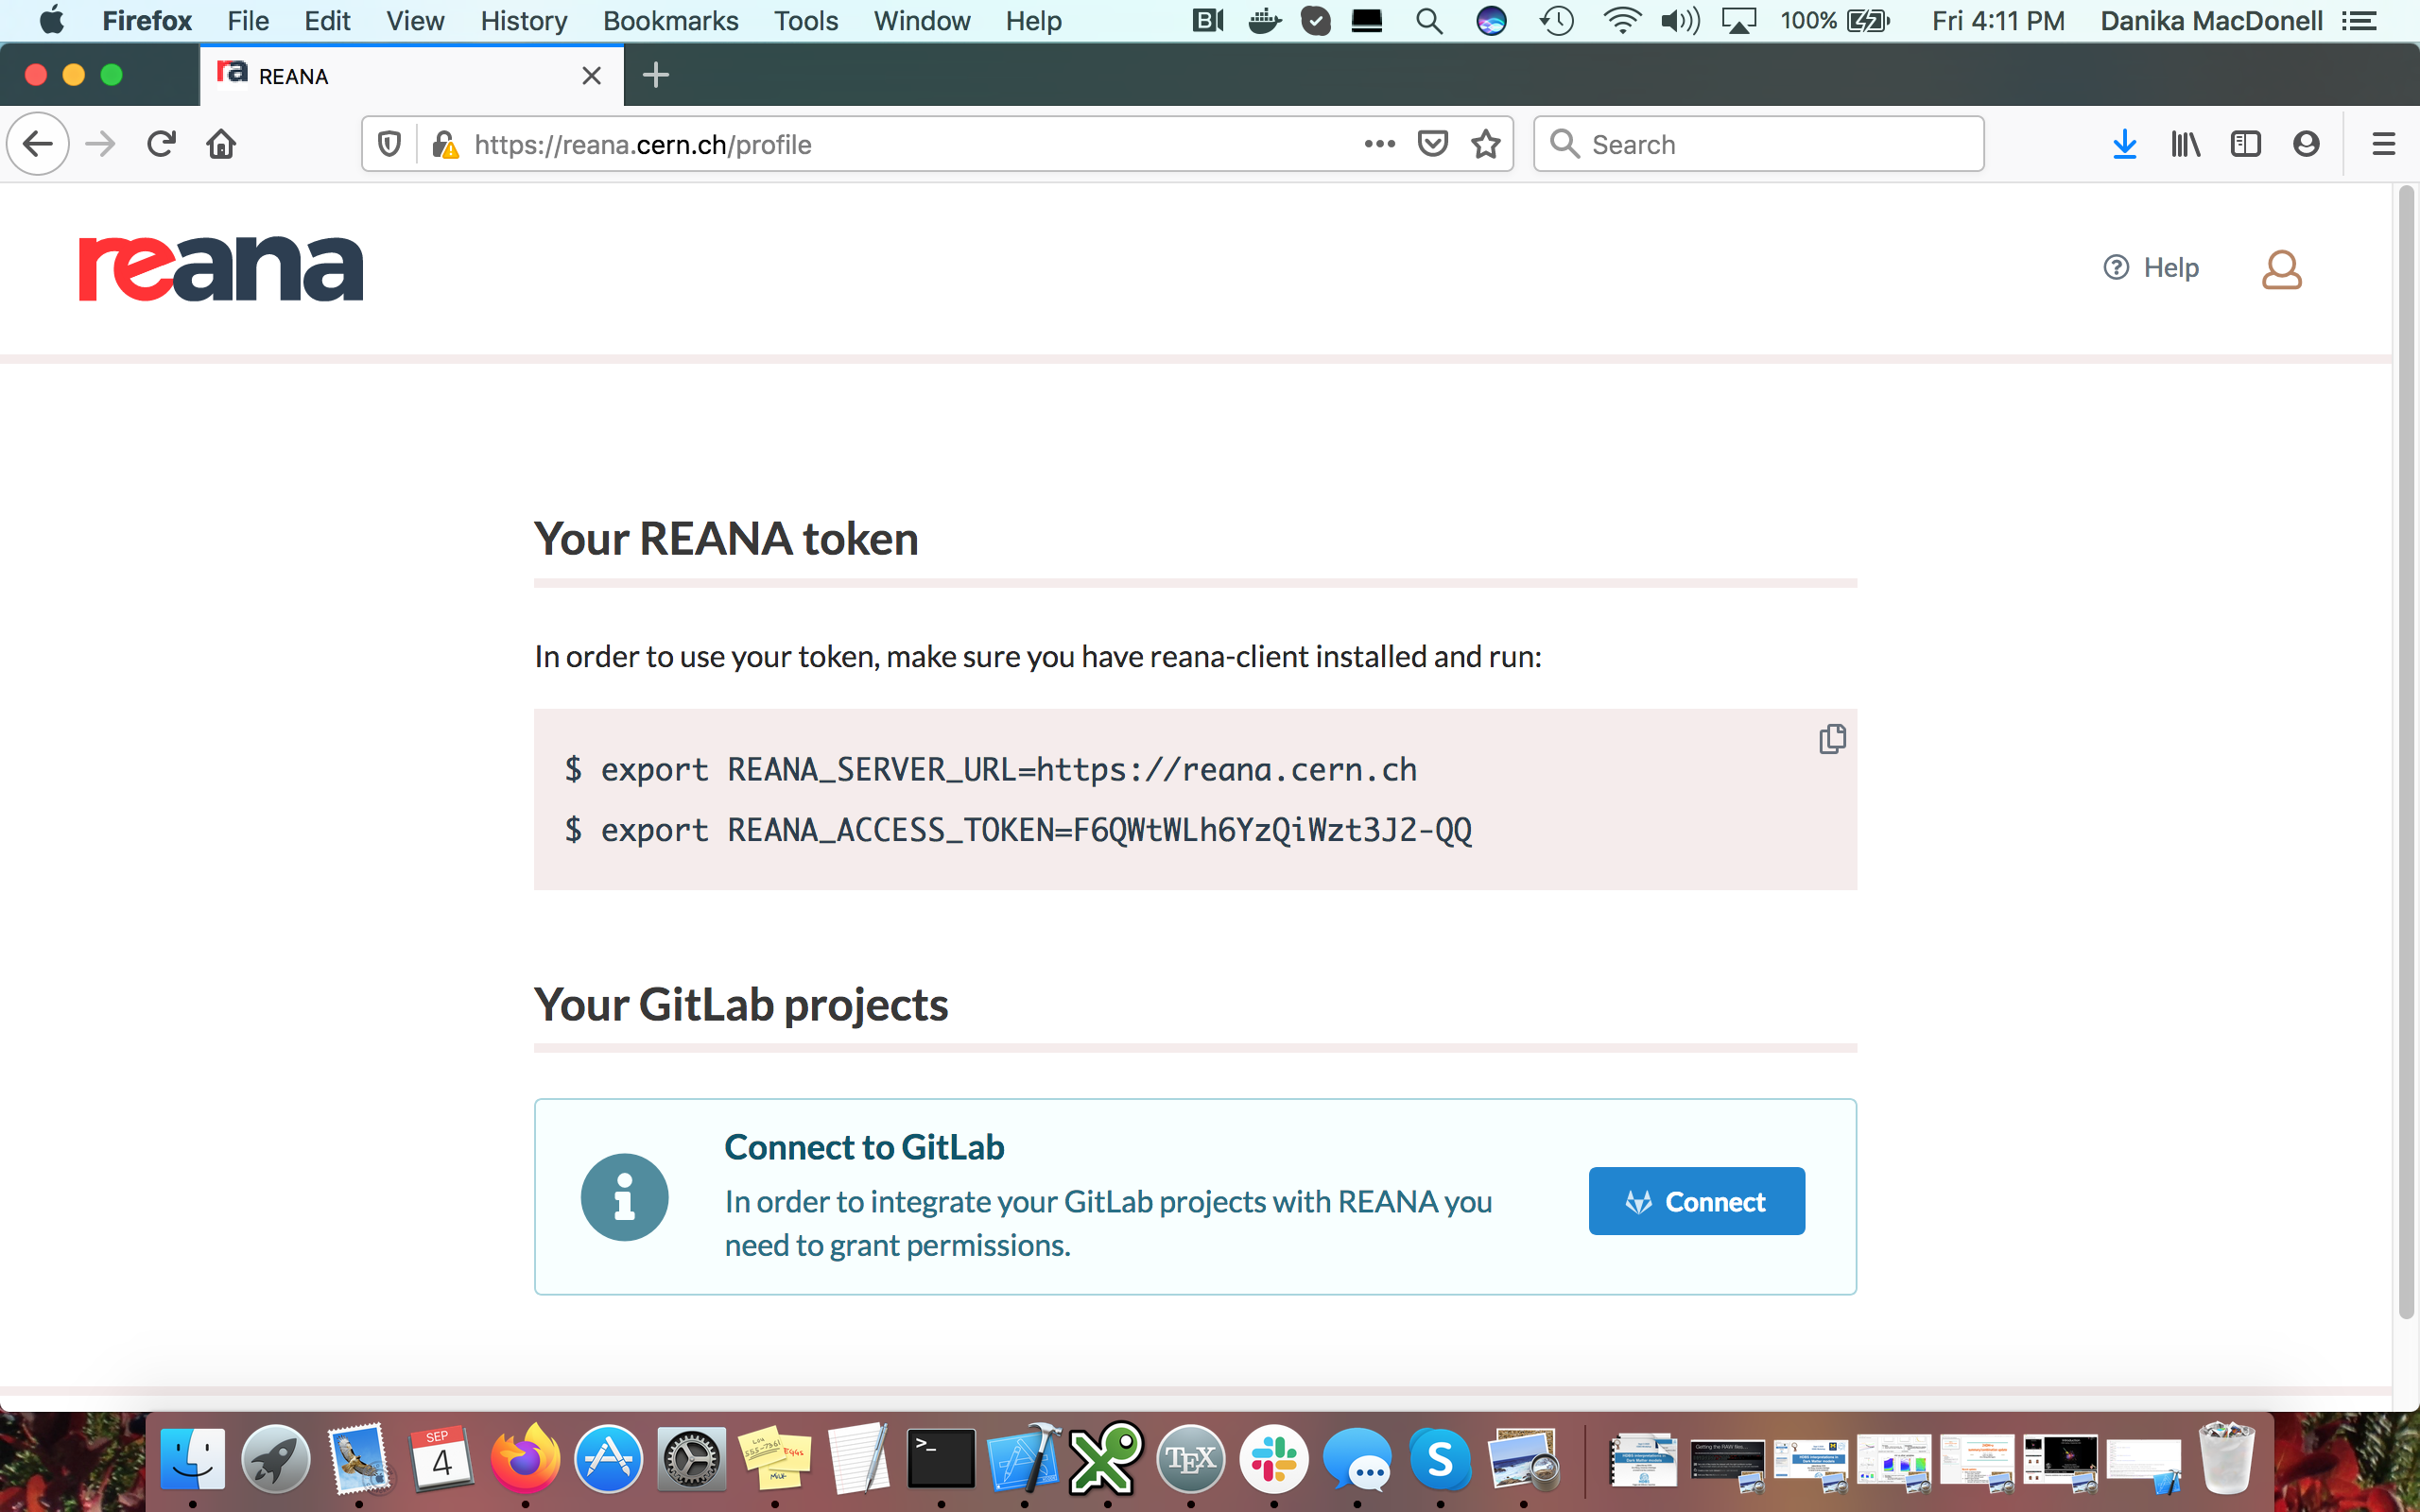
Set these environment variables up as follows:export REANA_SERVER_URL=https://reana.cern.ch/
export REANA_ACCESS_TOKEN=XXXXXXX

which will open up the following page:
 If this is your first time using the CERN REANA cluster, you’ll need to request an access token. You’ll be prompted to request one the first time you open the user interface for the cluster in your browser. Go to https://reana.cern.ch in your browser.
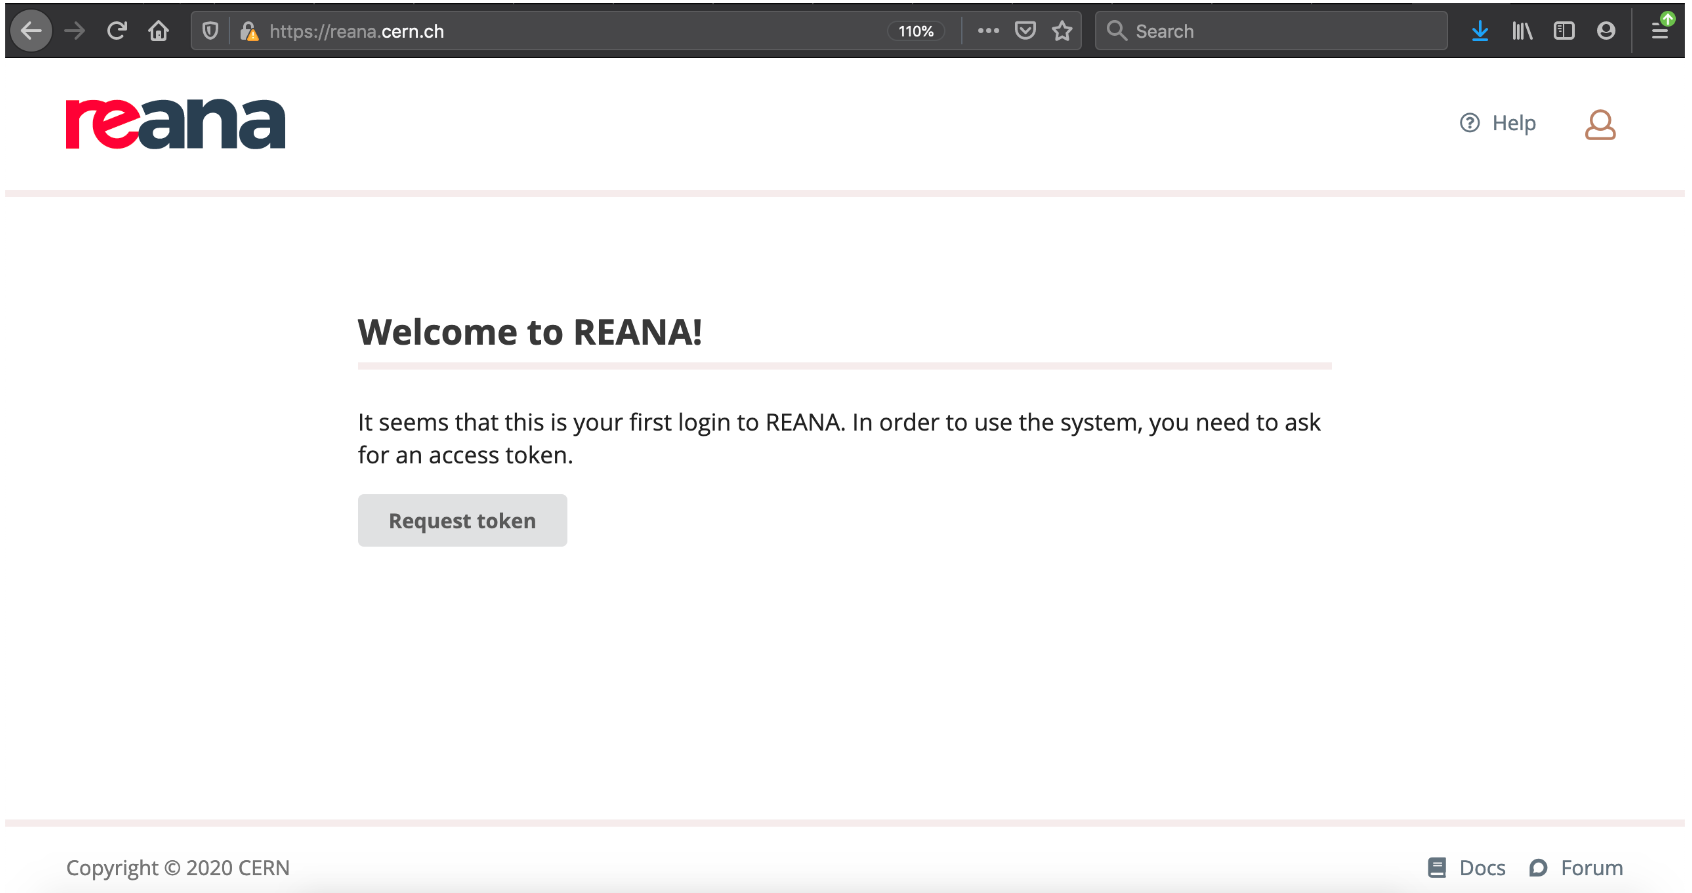
If after logging in with your personal CERN credentials you see a page like this:
 then click on the `Request token` button and you should be hooked up with a shiny new access token within a CERN working day or so. If you haven't received a token after a day or so, you can ping either the atlas-ap or the REANA channel on mattermost to make sure your request has been received.
Setting up kerberos authentication
If your workflow requires kerberos authentication (eg. to access files stored on eos), then please follow the instructions here to generate the kerberos keytab file and upload it as a secret to the reana cluster.
Executing the workflow
The workflow can now be executed from the top level of your workflow directory (i.e. the level where the recast.yml file is located) using the recast-atlas client.
First, set up your RECAST user credentials and authentication if your workflow uses non-public images or inputs:
# To pull images from a gitlab registry that $RECAST_USER has access to
eval "$(recast auth setup -a $RECAST_USER -a $RECAST_PASS -a $RECAST_TOKEN -a default)"

# To access private data that $RECAST_USER has access to on \eos
eval "$(recast auth write --basedir authdir)"
Next, add your recast workflow to the RECAST catalogue
$(recast catalogue add $PWD)
You can now submit the workflow to REANA using the recast-atlas submit command with the reana backend:
recast submit your_workflow --backend reana --tag myanalysis
where your_workflow is the name given to the workflow in the recast.yml file (eg. examples/helloworld in the case of the helloworld example workflow).
After submission, you can monitor the job either using the UI on reana.cern.ch, or using reana-client commands (see reana-client --help for all available commands):
# Check the status of the workflow
reana-client status -w recast-myanalysis

# list workspace files
reana-client ls -w recast-myanalysis

# download results
reana-client download -w recast-myanalysis